Pages

Showing posts with label Sally Hansen. Show all posts

Sally Hansen Oxide

Friday, September 30, 2011

Good evening, Dear Reader!

Tonight I have pictures to show you of Sally Hansen Complete Salon Manicure Oxide, one of the Tracy Reese shades for Fall 2011 that their PR sent me to review.  It's a really gorgeous charcoal along the lines of a darker Chanel Graphite, really the closest thing I've seen to Graphite with respect to finish, although a good bit darker.  If you recall, it's the finish in Graphite that made me swoon, and Oxide does the same.

I currently have a pretty big backlog of cool things to show you all set aside together, and Oxide is one I've really been looking forward to trying out.  I knew I'd have an opportunity to change nail color this evening, but had been torn as to what I wanted to wear because this manicure will have to stay until Sunday, and tomorrow night a friend of mine, the coolest boss I've ever had, is playing his last live show after a few decades of performing.  That's right, an IT-guy rock star.  The original plan was to coordinate with cool shoes, but last weekend I really sprained my ankle wearing hideous matronly flats to take out the trash, so I have to wait until I'm leaving to pick what I can wear (I think that was The Goddess of Hot Shoes sending me a warning, which I'll heed in the future).  Then I got a surprise when UPS delivered some non-nail-related stuff I'd ordered during a 50% off of clearance prices sale, and when I placed the order I saw a giant black rose rhinestone ring that ended up being under $3 after all the percentages off, so I added it.  When I saw it in person today, Oxide seemed like a perfect choice.

For this manicure, I used one coat of base coat, two of Oxide, and one of Lippmann Addicted to Speed since I wanted it to dry really fast and be perfect.  After it dried, I went out to take pictures, and had a kind of funny experience.  I'm friendly with the ladies who live on either side of me, and both recently had babies.  I guess they both came home with their babies in tow at the same time and met in the middle in my yard to chat.  I went out with stuff to take pictures, said hello and had a little chitchat including assurance that I didn't mind them meeting in the middle, but it was late and the last of the light would be gone if I took too long, so I just went about the business of taking the pictures with them standing there a few feet away, offering no explanation.  One of the husbands came home while I was taking pictures and went up to his wife, so at this point there was a small crowd chatting in my yard pretending that I'm not over in the corner evaluating light and clicking away.  They still have no idea why the heck I keep taking pictures of small things I'm hiding in my hand!  It was socially awkward enough to be entertaining at the time.

After all of that, I got some good pictures of Sally Hansen Oxide in sunlight.

Sally Hansen Oxide
Sally Hansen Complete Salon Manicure Oxide Nail Polish, Two Coats

This is a closer look at the shimmer.

Sally Hansen Complete Salon Manicure Oxide
Sally Hansen Complete Salon Manicure Oxide Nail Polish, A Look at the Finish

And just for fun, I took a picture of it with my fabulous cheapo ring.

Sally Hansen Complete Salon Manicure Oxide Nail Polish
Sally Hansen Complete Salon Manicure Oxide Nail Polish & A Fabulous Ring

I love this a whole lot.  Admittedly, the overall look is somewhat vampiric, but aside from wearing nothing but pastels all the time, there's not much to be done about that so I go with it.  I'm extra happy about having a manicure I love as the start of an ensemble for a fun event tomorrow night.  I would have been fine with a blood red that went with anything, but it's always a little more enjoyable to wear something that thrills me.

That's the scoop on Sally Hansen Complete Salon Manicure Oxide, which should be showing up with the other Tracy Reece shades any day now.  Until next time, Dear Reader, love and nail polish to you!


All Rights Reserved, Siobhan@The Nailphile. If you're reading this elsewhere, it's stolen from a real nail polish blog.

Sally Hansen Complete Salon Manicure Himalayan Blue

Wednesday, September 28, 2011

Good morning, Dear Reader!

After two days of wearing Skyscraper, which is truly spectacular in sunlight, I figured I'd go for something a little more basic and upbeat and chose Sally Hansen Complete Salon Manicure Himalayan Blue, one of the Fall 2011 Tracy Reese shades.

Himalayan Blue is a really lovely intense sky blue creme, and in applying it I was impressed with its quality.  The polish is very well pigmented, with two coats being plenty, easy to control, and dried very quickly to an unusually high shine.  I used a base coat, two coats of Himalayan Blue, and a coat of Poshe.  After it dried, I took a picture of it in sunlight, and you can see in the picture just how shiny it is, especially since Poshe doesn't add much in the way of shine.

Sally Hansen Complete Salon Manicure Himalayan Blue
Sally Hansen Complete Salon Manicure Himalayan Blue Nail Polish, Two Coats

Although not a traditional color for fall, Himalayan Blue feels right for an autumn day like today in the Midwest - the sun is out after a couple grey days of rain, and it's a cloudless perfectly blue sky.  These are my favorite beautiful days before the cold begins to set in, so I really like a polish that feel just right for them.  Of course, the temptation was to Konad this, being a plain creme, but a plain particularly happy color is sometimes best left alone.  I might add to it after wearing it for a day, but today I'm just going to savor the pretty simplicity.

This was sent to me by Sally Hansen's PR for review, and the press materials indicated that the Tracy Reese shades would be available in fall with nothing more specific regarding a date.  Sally Hansen limited editions normally tend to show up in my area within the first week or two of release, and I can tell you that they're not here yet.  I've been to the two stores where collections usually show up first locally for other stuff in recent days and took a detour to cosmetics to see if they were around, but they weren't, so just keep an eye out for them because they should be available very soon now.

That's Sally Hansen Complete Salon Manicure Himalayan Blue, so until next time, Dear Reader, love and nail polish to you!


All Rights Reserved, Siobhan@The Nailphile. If you're reading this elsewhere, it's stolen from a real nail polish blog.

Sally Hansen Complete Salon Manicure Bewitched

Saturday, September 17, 2011

Good morning, Dear Reader!

I was looking for something dignified this morning, and I picked Sally Hansen Complete Salon Manicure Bewitched, which is one of the upcoming limited edition Tracy Reese polishes for fall 2011.

Bewitched is an interesting shade in a good way, kind of a cross between plum and the (I can't think of a more savory description for this) dried blood shades with a creme finish.  I used a base coat, two coats of color, and a top coat for this manicure.  I found that Bewitched almost gives full coverage in one thin coat, but I did need the second to make it completely even on all ten nails.  It dried to be pretty markedly darker than bottle color, as you can see in the picture.  This is Bewitched on a cloudy day.

Sally Hansen Complete Salon Manicure Bewitched
Sally Hansen Complete Salon Manicure Bewitched Nail Polish, Two Coats

That's quite a big difference between bottle shade and dry-on-the-nail shade, but I'm happy with how it looks on the nail.  The down side to a significant difference in bottle color versus dry color is that I have to remember that Bewitched is one of that dries darker, but if that's its biggest trouble, I can live with it.

Bewitched does have the usual Complete Salon Manicure brush, which I know is not the most popular design ever, but it's worth noting that it does a really nice job once you get a feel for it.  I don't recall what the first shade from this line that I used was, but I do recall thinking that it looked like I'd let a little kid paint my nails the first time I used this brush.  It has an unusually long stem, lots and lots of short bristles trimmed to a rounded shape, and it's wider than average, and the result is that it holds a lot of polish and is a little harder to manipulate than most.  Since I have great big nails by some standards, that might seem like a good thing, but it's easy to pick up way more polish with it than I want for one nail.  I found that wiping off both side of the brush inside of the bottle's neck rather than just one side as I normally do fixes the issue of quantity, and once the excess polish is wiped off, I found it's way easier to control where the remaining polish goes.  Having gotten a feel for using the CSM brush, it does a great job (there was no cleanup on this mani), but it took several crappy to marginally bad manicures to get to that point.  Since the colors in this line are so often very nice, it was worth the effort of learning to work with the brush.

That is Sally Hansen Complete Salon Manicure Bewitched, the first of the Fall 2011 Tracy Reese polishes that Sally Hansen's PR sent for review, so until next time, Dear Reader, love and nail polish to you!


All Rights Reserved, Siobhan@The Nailphile. If you're reading this elsewhere, it's stolen from a real nail polish blog.

Sally Hansen Salon Effects Girl Flower

Friday, September 16, 2011

Good morning, Dear Reader!

As planned, I'm kicking off my forties today wearing Sally Hansen Salon Effects Nail Polish Strips in the Girl Flower pattern.  There have been a few questions in recent weeks regarding whether a given age is too old for a particular look, and I think the nail strips give a pretty clear picture of my position on that.

In using various Salon Effects strips, I'm finding that there's variance in the durability of the strips, and the Girl Flower strips seemed a little more delicate than others I've used.  Once I realized that making a little tear in one of the first, I was just more careful in peeling them and didn't have any noteworthy problems.  I applied these to bare nails, no base coat at all, and bare nails seem to be preferable.  I didn't have the application nightmare I did last time, there weren't problems today, so it's fair to say the one tough application was a result of error on my part coming from being tired out. There's one thing I finally thought of doing when it mattered that might be worth passing on: I always start with my left hand, and I remembered to skip my left thumb so I could use that nail to peel the strips for my right hand, which is easier than peeling with a freshly decorated nail.  After applying the strips I added top coat to them to seal them and shine them up.  Here's my Girl Flower manicure.

Sally Hansen Salon Effects in Girl Flower
Sally Hansen Salon Effects Nail Polish Strips in Girl Flower

I love this.  My index nail always has a kind of messed up spot at the end of my nail bed because of the curve of my nail, but that doesn't show at all without magnification.

That's my forty-year-old's Girl Flower manicure, and I'm off to have one really good day.  Until next time, Dear Reader, love and nal polish to you!


All Rights Reserved, Siobhan@The Nailphile. If you're reading this elsewhere, it's stolen from a real nail polish blog.

Sally Hansen Salon Effects Cut It Out

Thursday, September 8, 2011

Good afternoon, Dear Reader!

I applied a set of Sally Hansen Salon Effects today, using Cut It Out, the black and white floral pattern.  Real life is overloaded busy these days, so as the week wears on, I get more and more tired and do dumb things, and this application was riddled with dumb mistakes.  For a reference point, my first try using them was with Laced Up, and they came out close to perfect.  Today, I was able to let go of the hope of perfection very early in in the process.

I've had the gold glitter nail polish strips on as a pedi since I made the first Salon Effecst Strips post, so ten days of wear.  For a few days, one of them has shown a crack when waterlogged, but once it's dry the crack doesn't show.  I was waiting for it to chip and finally decided if it hadn't by now, it wasn't going to and I removed it.  The nice thing about the glitter strips is that they're smooth on the surface, not gravelly like glitter polish, and they removed as easily as the Laced Up strips did.

To start the application, I laid out all the strips from one of the two packets in the box and picked out the five for a manicure.  My hope was to get a full mani and full pedi out of one packet after some of the Laced Up comment indicated that it was indeed possible on longer nails.  When sizing them on my nails, it was clear that the length from the cuticle to the tip of my nails, down the center, was longer than one-half of one strip, so using only the five for a full mani wasn't an option for me.  I trust that it's entirely possible for those who suggested it, so I'll have to give it another shot the next time I have a bad break.  I applied a coat of nail strengthener to give the strips something to stick to, which may well be where my difficulties started.

Here's where the really dumb mistakes came in... I kept placing them really off center or too far from the cuticle so they looked grown out, and my left hand has only one nail without some sort of fix, my index finger.  After the first error I removed the strip for a do-over, but it soon became clear that I'd run out of strips long before I had a finished mani if I kept doing that, so I started just fixing them and moving along.  At the end I sealed them with top cat.  I'll show you the picture first do you can look for the repairs while I tell you about them.

Sally Hansen Salon Effects Polish Strips Cut It Out
Sally Hansen Salon Effects Nail Polish Strips in Cut It Out


The first two went unrepaired - my thumb strip is too far from my cuticle and the index has a wrinkle near the tip, but neither is visible enough to risk messing them up doing anything further to them.  My middle nail was the one that showed me this wasn't going to be easy, and not because of the product.  I laid a strip down maybe halfway up my nail, not even in the general neighborhood of my cuticle, and it's the one where I did a do-over.  After the new coat of strengthener dried, I used the closest sized strip to the one I wrecked, which was a little big, and laid it down a few millimeters down the finger from my cuticle, but the overlap was only on the side on the left and along the left side of that nail since I laid it down completely off center again.  At this point I was out of strips that would fit, so I used the little orange stick from the package to fix it.  With the pointy end I made a dotted line between the excess and what was on my nail, and with the flat edge I scraped off the excess, and what remains along the edge there will come off in the shower in a bit.  It's not perfect, but that worked quite well.  My ring finger was another centering issue, so I cut off a rounded edge from the extra length of the strip used on that nail to fill in the side on the left in the picture.  The pattern has a break in it at the overlap, but it's hard to see.  My pinky, I laid it down way too far up the nail again, so didn't press the strip down but gently lifted it back up.  Some of the strip stayed stuck on, so I smoothed that onto the nail, then turned the same strip around to use the other cuticle-shaped edge and just put it over the other, and it worked fine.

For the second hand, I was even more tired but also annoyed with myself so I wasn't thinking, and those look fine.  One right-hand nail has a double layer resulting from falling short of the cuticle, but that was the only problem.  Overthinking when I'm way too tired generally results in mistakes, and that's what happened here.  I'm sure you get too tired to function well too, which is why I wanted to show you how nicely the strips took to tidying up errors.

I'd gone back and forth on doing the pedi through this, and finally guilted myself into doing it when I considered that the opened leftover strips would dry out and be useless, so if I ever wanted a Cut It Out pedi, I'd better get on with it.  However, all that remained after my arduously complicated mani application were the two gargantuan strips and one super-skinny strip, and when I assessed that they'd be enough to cover all ten remaining nails only if I successfully cut out and applied a lot of little pieces, I threw in the towel and threw out the last three strips.  A honest consideration of the outcome of it, in light of today's application skills, made it seem like I just skipped the steps where I cut out and fail at applying the pieces of strips and went directly to throwing them out.

That's my long story of applying the Cut It Out strips.  It was a hassle, but looking at the outcome I'm very happy, and I cringe at the thought of what a Konad attempt would have resulted in today!  Until next time, Dear Reader, love and nail polish to you!


All Rights Reserved, Siobhan@The Nailphile. If you're reading this elsewhere, it's stolen from a real nail polish blog.

Sally Hansen Complete Salon Manicure Fall 2011

Tuesday, September 6, 2011

Good afternoon, Dear Reader!

Today I have a limited edition Sally Hansen Complete Salon Manicure collection to show you.  You might have read about it last Spring when promo images first came out, it's the collection created for Prabal Gurung's Victorian-inspired Fall collection.  Here's the backstory from Sally Hansen's PR:

Red carpet favorite Prabal Gurung teamed up with Sally Hansen and to create a new collection of Sally Hansen Complete Salon Manicure nail polishes to complement the designer’s Victorian-inspired fall collection. Celebrity manicurist, Jin Soon designed and hand painted each set of nails with new fall hue, Crinoline, a warm white base and added flecks of black polish for an Asian inspired design. Prabal Gurung and Sally Hansen will release their full five-color Sally Hansen Complete Salon Manicure collection in the fall. The patented polishes feature the most advanced lacquer formula, concentrated high-intensity color and encapsulated treatment spheres of Vita-Care technology.

Here's a promo images of the color all lined up.  It's a tiny one, but I have giant swatches so you'll see detail of each.

Sally Hansen Complete Salon Manicure with Prabal Gurung
Sally Hansen Complete Salon Manicure with Prabal Gurung for Fall 2011

Furthest to the left is Dorien Grey, a nice medium light grey that's between a jelly and a creme.  At two coats it looked like a well-pigmented jelly, at three it's a super shiny creme.  This is three coats without top coat.

Sally Hansen Complete Salon Manicure Dorien Grey
Sally Hansen Complete Salon Manicure Dorien Grey Nail Polish, Three Coats

The next one over is Crinoline, which is a barely beige-pink creme.  I needed three coats because I made the coats thin, and the third was required to even it out.  I think two moderate coats would do the same thing, but three is pretty standard for something this pale.  This is without top coat.

Sally Hansen Complete Salon Manicure Crinoline
Sally Hansen Complete Salon Manicure Crinoline Nail Polish, Three Coats

Ballet Rouges is in the middle, and it strikes me as a modern version of Crayola Carnation Pink in a creme nail polish.  It has a little of that faded-out quality that's common in very recent years, but it still looks Carnation Pink for the most part.  It's a great balance of pigment and shine, and two coats was perfect.  Here's Ballet Rouges without top coat.

Sally Hansen Complete Salon Manicure Ballet Rouges
Sally Hansen Complete Salon Manicure Ballet Rouges Nail Polish, Two Coats

The second from the right is Courtesan, a bright fuchsia creme that's also very pigmented and very shiny.  Two coats was plenty here, and the picture of Courtesan is without top coat.

Sally Hansen Complete Salon Manicure Courtesan
Sally Hansen Complete Salon Manicure Courtesan Nail Polish, Two Coats

The last one is Madame X, a slightly pinkish red creme.  One coat gave even, opaque coverage and I added a second for shine.  This is what I'm now wearing as a manicure, so Madame X does have top coat.

Sally Hansen Complete Salon Manicure Madame X
Sally Hansen Complete Salon Manicure Madame X Nail Polish, Two Coats

The quality of each of these is quite nice and I have no complaints about them, so I think it come down to color preference.  I always like well-done or updated simple shades, and these qualify.  Madame X is nice enough that I'd choose this formula over just about any other for the shade.

The press release tells me they'll be out this Fall, and that's as specific as it gets.  If I get additional info, I'll tack it on here, but I really have no reason to believe the release of these will be different than other, so different retail locations will likely get them at different times over the next couple of months.

That's what I know about the Prabal Gurung Sally Hansen limited edition colors, so until next time, Dear Reader, love and nail polish to you!


*The products featured were sent for independent review by a PR firm.

All Rights Reserved, Siobhan@The Nailphile. If you're reading this elsewhere, it's stolen from a real nail polish blog.

Sally Hansen Limited Edition Halloween Salon Effects Nail Polish Strips

Monday, August 29, 2011

Good evening, Dear Reader!

I ran across something cool I thought you might want to know about, so I'm here to tell you.  I've been eyeing the various patterns of Sally Hansen Salon Effects Nail Polish Strips, and I ran into some limited edition Halloween ones that look really fun.  That's the kind of thing that'll test your last nerve to hunt for in stores much of the time, and the good news is I found them online for $8.  Here are the pictures of the patterns.  They're skinny pictures, so I'll just put the giant versions right here.


Spun For You


Wish Nets


Hot Wired


Numbskull


Ghoulie Girl

I found them listed as "Salon Effects Nail Polish Strips-Limited Edition Halloween" on Ulta.com for $9.99 retail, but the reason I was on their site was a 20% off code, which is 61252.  I don't know all the details of the code like end date and stacking codes, but I'd wager they're on the site somewhere.  It's a good price for them and Halloween stuff pops up and disappears so fast that I thought I'd let you know about them.

I'm really digging these nail polish strips in general (as well as the Halloween ones specifically!) - my mani's still good, but I'll likely change it tomorrow.  I used the gold glitter strips for a pedicure so I can do a real wear test on them though.  I tend to leave a pedi alone for a really long time - I remember crossing the Ridiculous line with one, and made the conscious decision to see if I could bear to just grow the whole thing out and did it (just cutting them and leaving my hot pink polish on there).  I wish I could say that at the time I wasn't writing a nail care blog, but alas...

That's about all I wanted to pass on, so until next time, Dear Reader, love and nail polish to you!


**Added 08/30/2011: I just saw a display of these in person.  It's a tabletop display, so one that goes on a shelf, and there are two boxes of each per display.  These pics are representative of all but the green, which looks very cool in person (but I bring you this information empty handed).

All Rights Reserved, Siobhan@The Nailphile. If you're reading this elsewhere, it's stolen from a real nail polish blog.

Sally Hansen Salon Effects Laced Up

Sunday, August 28, 2011

Good morning, Dear Reader!

Today I have something new to me to show you, Sally Hansen Salon Effects Nail Polish Strips in Laced Up.  If you recall, I tried Sephora by OPI's Chic Prints when they first came out and didn't love them, so despite hearing good things about the Sally Hansen strips, I was reluctant to try them until Sally Hansen offered to send some for review, which is where this pack came from.  They're completely different than the Sephora ones, so I took a lot of pictures to show them to you.

The pattern is Laced Up, which is black lace over a neutral base.  I did a manicure in black Konad over a neutral some time ago, and I thought it was okay, but my opinion of it was higher than the general opinion reflected in the comments (that's my delicate way of mentioning it was largely hated).  I used Laced Up today because I wanted a very cool manicure for something later today but didn't feel like investing the effort in one. I took out the package of nail strips, unpacked everything in the box, and read the directions (to any gentlemen reading, that's the normal way to do it, the unpacking and direction reading).

The directions told me how to clean off my nails for application, recommending totally bare nails.  I normally follow directions precisely the first time with a product, but here, that deviated from how I would reasonably use it so I changed it up a little bit (this is not the normal way to do it).  I chose them because I feel lazy and didn't take off yesterday's manicure, so I took out two isopropyl alcohol pads and used the first to clean the day old polish on each nail of my left hand and set the second aside for my right.  Then I got about the business of applying the nail strips.

The most significant difference between these and the Chic Prints is that these are made out of nail polish while the Sephora ones I tried were some kind of plastic, like decals.  With the decals, I struggled with wrinkles over the natural curves of my nails, with that being the biggest disadvantage to them, and these didn't cause any trouble at all.  Since these are polish, they're super-sealed in the packaging, being sandwiched between two layers of plastic.  I took pictures of the steps as well as I could using a leftover because by the time I did the second hand, each nail was taking well under a minute to complete, so this is really easy and I wanted to show you how easy.  This is the the strip as it comes out of the package.


Sally Hansen Salon Effects
Sally Hansen Salon Effects Nail Polish Strip

The top layer is a thin but strong plastic film that gets peeled off from the blue tab.  I mention it's strong because there were no problems with tearing it.  I forgot this step with one, which messed up the nail a little because some of the polish strip came off when I managed to peel the plastic off, but I was able to save it (I'll get to how when we look at that picture).  This is peeling off the plastic.


Sally Hansen Salon Effect Nail Polish Strips
Sally Hansen Salon Effect Nail Polish Strips, Plastic Peeled


The next step is removing the polish strip from the backing


Sally Hansen Salon Effect Strips, Peeled
Sally Hansen Salon Effect Nail Polish Strips, Peeling Strip

Then I took off the little tab, and this is what's applied.


Sally Hansen Salon Effects Nail Strips, Ready
Sally Hansen Salon Effects Nail Polish Strips, Ready to Apply

To apply, I chose which end better fit my cuticle and touched the strip down centered at the cuticle, slightly stretched it to the center of the tip of my nail, then stretched each side as I pressed it down.  It's the stretchiness of these that's very cool - it lets the strip really take the shape of a nail.  I pressed down one side of my demo strip and stretched it to show you how elastic these are.  Here, you can see how that came into play in fixing my error - it's at the cuticle of my thumb nail here, at the corner closer to the strip, that I pulled off a piece when I forgot to remove the top plastic layer and ripped up a bit of the strip when I got the plastic off my nail, so I tore off a little bit from the opposite end of the strip and covered the spot.  The pattern is imperfect there as a result, but that's a handy trick.


Sally Hansen Salon Effects Nail Strip Stretched
Sally Hansen Salon Effects Nail Polish Strip Stretched Out

To finish, the directions told me to lightly file the end with an included file, but I found that while applying them that I could stretch it over the tip and my nail would cut the strip, so I just did that.  My last step wasn't in the directions, which was finishing it with top coat, applied to each nail as soon as the strip application was finished.  Here's my mani, which took under ten minutes from start to finish.


Sally Hansen Salon Effects Laced Up
Sally Hansen Salon Effects Nail Polish Strips in Laced Up

I definitely like these a lot.  The price varies pretty significantly since they're a drug store item that often goes on sale, and of course they're costlier than regular polish, but I think for instances like this, where I really want a cool manicure and it's just not going to happen with regular supplies, they're great.  I'd also bring these along on a trip lasting several days since it worked to put them over an existing manicure and they're not a hassle to get through airport security.  I've seen pictures of a pack that's a bright crazy flower pattern, and those are some that I really want to try now that I know how well they work.

I have a few more packs of these that were sent, so I'll show you more of them soon.  Frankly, I can't believe that smacking something over another manicure worked out so well.  I know it's not absolutely perfect and that if you try, you can see a few spots of the red at some edges in the picture, but the reality is that it's only in the moment that I'm taking the picture that it matters how a manicure looks in a macro picture.  Knowing where to look, it takes a few seconds to identify the red on my hands looking at them, so I doubt anyone else would ever see it.

That's what I know about Sally Hansen Salon Effects Nail Polish Strips, so until next time, love and nail polish to you!


All Rights Reserved, Siobhan@The Nailphile. If you're reading this elsewhere, it's stolen from a real nail polish blog.
Sally Hansen Xtreme Wear Teeny Greeny Bikini

Thursday, August 25, 2011

Good morning, Dear Reader!

I'm continuing to work my way through the Fall 2011 Sally Hansen Xtreme Wears today with Teeny Greeny Bikini, a pale green shimmer with the same finish as the others from its display.  It applied well, and I needed three thin coats to make it opaque and even.  It dried nicely, so a third coat wasn't a problem at all.

This is Sally Hansen Teeny Greeny Bikini in the sun after it dried.


Sally Hansen Xtreme Wear Teeny Greeny Bikini
Sally Hansen Xtreme Wear Teeny Greeny Bikini Nail Polish, Three Coats

So far, eveything from that display has been unusually nice.  I've long been a fan of Xtreme Wears, particularly the seasonal collections, but I think this release has bumped Sally Hansen Xtreme Wear to the front of the line of my favorite drug store nail polishes.

That's what I know about Teeny Greeny bikini, Dear Reader, so until next time, love and nail polish to you!


All Rights Reserved, Siobhan@The Nailphile. If you're reading this elsewhere, it's stolen from a real nail polish blog.

Sally Hansen Xtreme Wear Pumpkin Spice

Tuesday, August 23, 2011

Good morning, Dear Reader!

Today I'm wearing Sally Hansen Xtreme Wear Pumpkin Spice, which is a very cool but kind of oddball glitter from the display that held Midnight Sky and friends.  It's a black jelly base with fine orange glitter, which sounds like the old Halloween standard, but Pumpkin Spice is a little bit different.

The black base is very lightly pigmented even for a jelly, and I ended up needing four coats to make it opaque and even.  It's not stark black at four coats, that's just enough for me to make it even without bare looking spots.  It seems like that could be by design - the result was that the glitter really got loaded up nicely, more than the Halloween polishes, and the impression I get from it is very late Fall, not Halloween.  I noticed applying it and again now that the glitter in Pumpkin Spice is very smooth, which is one of those factors that strongly affects the likelihood of me choosing a glitter polish over another when I go to change color.  I applied it last night very shortly before bed, so I used China Glaze Fast Forward to dry it.  Four coats of color right before bed is a bit ambitious and I was prepared to have it messed up this morning, but it dried quite nicely with only one flaw.  Unfortunately, that one flaw was the one that puts me off to various quick dry top coats - Fast Forward shrank the polish at my tips a bit.  I'd noticed some shrinkage with Fast Forward before, but I think it might be evaporating a little with use because it's more pronounced today.  Thinner might fix that right up, but that presents the question of where the heck I have thinner.

This is the finished Pumpkin Spice manicure in sunlight after it dried completely.


Sally Hansen Xtreme Wear Pumpkin Spice
Sally Hansen Xtreme Wear Pumpkin Spice Nail Polish, Four Coats

I think it's a nice polish, but particularly nice for a Fall novelty polish.  In the picture, the spots where the sunlight really hits the polish show just how smooth the glitter in Pumpkin Spice is with only one coat of top coat.  There's no unevenness to the surface, and I hope Sally Hansen keeps using glitter from whoever made this stuff so nice and flat.

That's Sally Hansen Xtreme Wear Pumpkin Spice and just about all I have for you this morning, Dear Reader, so until next time, love and nail polish to you!


All Rights Reserved, Siobhan@The Nailphile. If you're reading this elsewhere, it's stolen from a real nail polish blog.

Sally Hansen Xtreme Wear Pink-y Ring

Wednesday, August 10, 2011

Good morning, Dear Reader!

I'm working my way through the Sally Hansen Xtreme Wears with today's being Pink-y Ring.  It's smooth fine fuchsia glitter in a clear base, and not quite as much of a hit as the last several.

The glitter in Pink-y Ring is pretty sparse, so I used an opaque base color under it, one coat of Misa's I'm Going to Love Myself (I'm really hoping that name means in the Free to Be... You and Me sense).  Then
I added three coats of Pink-y Ring, and it's all nice and sparkly.  The pictures show the color, glitter size, smoothness, and density, but the focus made the sparkle go away.    On the nail, it's just as sparkly as in the bottle.


Sally Hansen Xtreme Wear Pink-y Ring
Sally Hansen Xtreme Wear Pink-y Ring Nail Polish, Three Coats over an Opaque Base

The glitter in Pink-y Ring is perfectly smooth with one coat of Diamont, so that's a good thing.  I picked this polish up and put it back a couple of times because I was concerned it wouldn't be opaque, and I got it hoping it was, so overall this one's kind of a disappointment even though I was able to get a manicure I like out of it.

That's Sally Hansen Pink-y Ring and the next installment in the Xtreme Wear Saga, so until tomorrow, love and nail polish to you!


Edited to Add: At 11:00 p.m. after wearing this  out and about on a sunny day and running around all evening, I love this manicure.  The glitter just glows throwing off fuchsia light and is flawlessly smooth.  I clicked the picture to see if it could give a sense of that on a 17" freshly calibrated monitor, and am pleased to report that it does.

The whole glitter photography thing drives me nuts, where the combinations of light, focus and shutter speed mean either I can get a picture to show glitter size, smoothness, and color clearly or the sparkle accurately, and the sun was so bright for this picture that out of the twelve I took, not one was the blurred version that would clearly show sparkle.  However, if you click on the picture for the great big version, there are glitter bits visible on my nails that show the fuchsia glow individually.  Since I didn't get the picture, here's the leap to how it looks in real life: see all the non-glowy glitter bits?  In person they do sparkle like the few, even in normal indoor light.  Between the girly color and the smooth, bright glitter, this one has won my heart whether it requires layering or not.

All Rights Reserved, Siobhan@The Nailphile. If you're reading this elsewhere, it's stolen from a real nail polish blog.

Sally Hansen Xtreme Wear Very Cherry

Tuesday, August 9, 2011

Good morning, Dear Reader!

I'm digging the sparkly Sally Hansen Xtreme Wears so much that I have another of them to show you this morning, Very Cherry.  It's a pink red (or red pink) with a finish like that of Deep Blue Sea and Midnight Sky.  Like those two, it's perfect in two coats and really easy to apply neatly.

For today's manicure I use one coat of a Nutra Nail base coat (as I continue to use things up), two coats of Very Cherry, and one of Diamont to dry it.  Here's my Very Cherry manicure in morning sunlight.


Sally Hansen Xtreme Wear Very Cherry
Sally Hansen Xtreme Wear Very Cherry Nail Polish, Two Coats

I have quite a few other things to show you that have been sent for review, but it was hard to pass up Very Cherry on a sunny day.  It's too pretty.

That's Sally Hansen Xtreme Wear Very Cherry, so until next time, Dear Reader, love and nail polish to you!


All Rights Reserved, Siobhan@The Nailphile. If you're reading this elsewhere, it's stolen from a real nail polish blog.

Sally Hansen Xtreme Wear Deep Blue Sea

Monday, August 8, 2011

Good morning, Dear Reader!

Today I have another polish to show you from that display of glittery Sally Hansen Xtreme Wears,  Deep Blue Sea  It's a pretty faded denim blue with a silver super cool sparkly finish similar to that in Midnight Sky.  It only took two coats to be even and opaque, and it dried particularly fast.  Here's Deep Blue Sea in kind of cloudy sunlight.


Sally Hansen Xtreme Wear Deep Blue Sea
Sally Hansen Xtreme Wear Deep Blue Sea Nail Polish, Two Coats

I took the picture about twelve hours after I applied the polish, so it stays really sparkly and shiny.  Both Deep Blue Sea and Midnight Sky sparkle a lot in normal indoor light, which is unusual and certainly a good thing.  You can see how well it applies, too - there was zero clean up to this manicure.  It's just really easy to make clean lines with this pairing of polish and brush.

That is Sally Hansen Xtreme Wear Deep Blue Sea and also just abuot all I have to tell you about today, so until next time, love and nial polish to you!


All Rights Reserved, Siobhan@The Nailphile. If you're reading this elsewhere, it's stolen from a real nail polish blog.
Sally Hansen Golden Tourmaline

Sunday, August 7, 2011

Holographic polishes have grown on me after not really being a fan for a long while. Maybe it's the summer sun pouring through my windows, but right now I can't get enough of them. I remembered that I had a couple Sally Hansen Prisms languishing in a drawer of my Helmer, so I decided to give them a whirl. I showed you Purple Diamond last time.

This is Golden Tourmaline.
Photobucket


I got very excited because I thought it would be a true red holo. And it is red, but the holo effect is not as strong in this one as in Purple Diamond.
Photobucket


(Here's Purple Diamond, if you don't feel like scrolling back.)
Photobucket


I wouldn't say this was "disappointing" per se. I still enjoyed wearing it. It just bears more resemblance to a straightforward red shimmer than a holo. It's still gorgeous in bright sunlight and would probably be a fun pedicure color. (Although I like holos on my fingers...so I can gaze at them admiringly. You know, like a lunatic.)
Photobucket


Lastly, a comparison.
Photobucket

Ozotic 511, SH Golden Tourmaline, SH Pink Diamond. This picture really shows how strong the Ozotic holo is compared to Golden Tourmaline. Pink Diamond is a little stronger, and the color is closer to the Ozotic.

I also tried a Sally Hansen Prisms duochrome, which I'll photograph in daylight tomorrow and share with you accordingly.

Sally Hansen Xtreme Wear Midnight Sky

Good morning, Dear Reader!

Today is the first Fall day for me, so I picked a great Fall color, Sally Hansen Xtreme Wear Midnight Sky, one from a display of all glittery Xtreme Wears I recently came across. It's officially Fall for me because there's something I'm allergic to, I think tree pollen, that makes me ears buzz really loudly so I can hear nothing at all, and this morning I woke up to the start of it. It happens every August, so waking up this morning, it just felt like Fall. It's not a big deal at all, just a tiny bit annoying, but it generates a lot of really funny conversations!

Anyhow, in light of an early Fall feeling, I reached for Midnight Sky. I looked at the display I mentioned, and was really pleased when I found this one. It's about the grey of the graphite in pencils, which is a handy segue to the reason I was so pleased about it.

I'd avoided pictures of Chanel Graphite so I wouldn't be too tempted until the Revlon rendition came out, and when I looked at comparisons it was that grey with a whole lot of Chanel sparkly bits that got me, not the Revlon. When I saw Sally Hansen Midnight Sky, the reason I was excited about it is that it has a whole lots of pronounced sparkly bits, and since it was that grey with a lot of sparkle I was after, I'm able to dismiss Graphite. Not having used a Graphite, I'd never propose that anything was a dupe for it, it's that the elements of Graphite that really appealed to me are in Midnight Sky, so I'm content with it for $20 less.

I used a Nutra Nail base (I'm just using up what's around and doesn't cause troubles), two coats of Sally Hansen Midnight Sky, which applied beautifully and was great in two coats, then Diamont. Here's Midnight Sky in sunlight (that sounds like something from Late Lament!).


Sally Hansen Xtreme Wear Midnight Sky
Sally Hansen Xtreme Wear Midnight Sky Nail Polish, Two Coats

Isn't that a nice one? I'm a big fan of the Xtreme Wear line - a lot of really nice colors of offered, and the quality of them is usually very nice for little cost.

That's Sally Hansen Xtreme Wear Midnight Sky and just about all I know this morning, so until next time, love and nail polish to you!


All Rights Reserved, Siobhan@The Nailphile. If you're reading this elsewhere, it's stolen from a real nail polish blog.
A couple of recent colors

Thursday, August 4, 2011

Hello there. It's been a busy week and I'm very glad tomorrow is Friday. The only bummer is that there's no Formula 1 race this weekend or ANY weekend in fact until the end of the month. At my house we do love our Formula 1 Sundays.

In any event, I thought I'd share some recent manicures. No real theme other than I have the photos and I wanted to post!
Photobucket

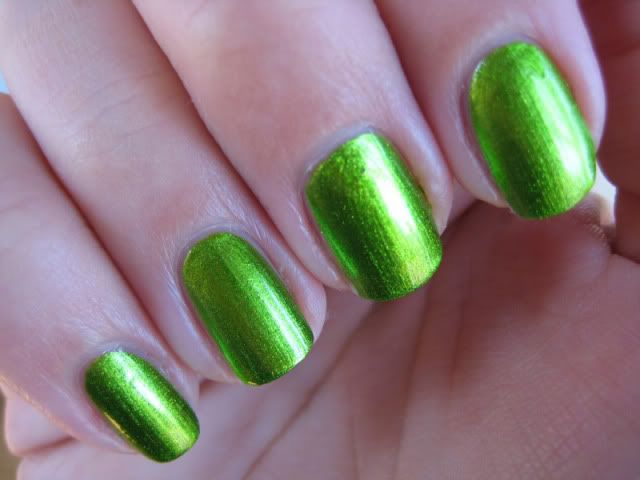
This is Kleancolor Metallic Green. I got some not-so-nice comments on this one along with some raves. Green nail polish is very polarizing for some reason, I guess. I like it. It's a very glowy polish. If you are into this sort of thing, it would make a good St. Patrick's Day manicure.
Photobucket

I have to say though that the not-so-nice comments took the fun out of wearing it a little bit. So it didn't give me the usual joy to look at it.
Photobucket

Someone on MUA mentioned they got this color for stamping, so maybe I'll try another fishnet manicure with this as the accent color.

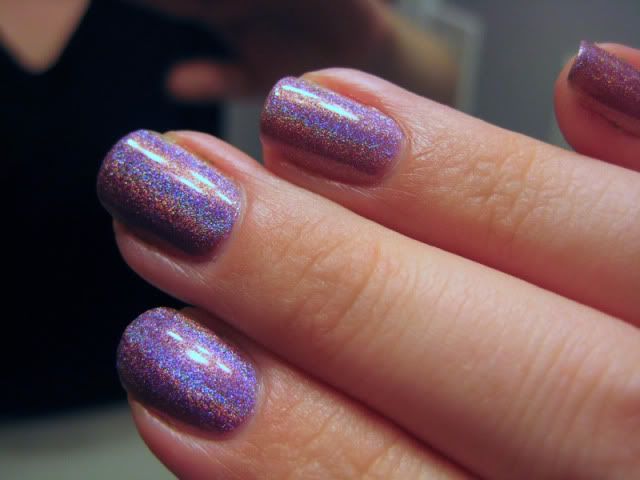
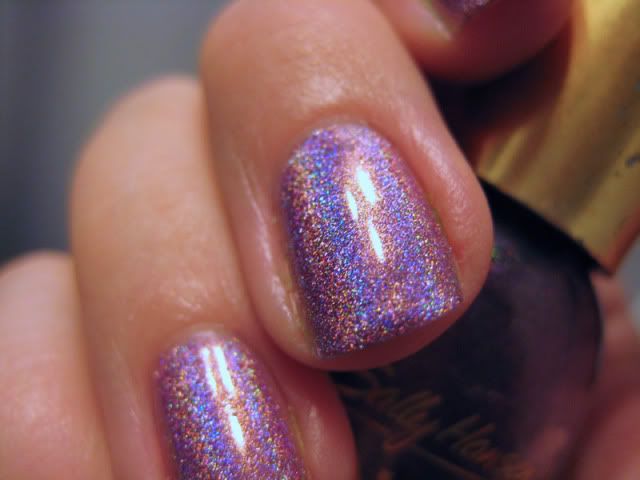
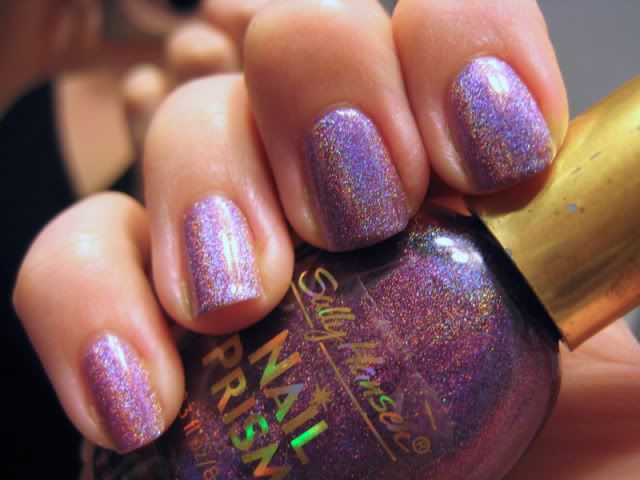
I was in the mood for another holo recently and I remembered that I have a couple of Sally Hansen Prisms. Unbelievably I found these in a local Dollar Tree. I feel like so many people find treasures at their Dollar Trees and mine are always nail polish wastelands. But one time I got lucky!
Photobucket

This is Purple Diamond.
Photobucket

I don't know if this is true for all of the Prisms, but this one has a very strong holo effect. It's even visible in relatively low light.
Photobucket

You'll have to forgive the leftovers of Metallic Green on my cuticles. It was stain-y!
 
My Ping in TotalPing.com

Most Reading